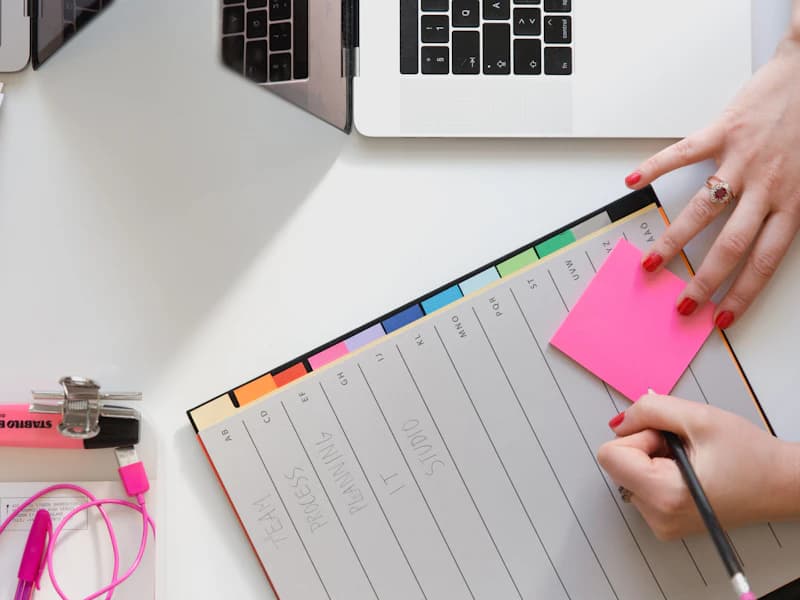
Here's a hard truth: your product photos decide whether a stranger trusts your store in the first three seconds. Before they read a word of your beautifully written description, they've already judged you on your images. Blurry, badly-lit, cluttered photos signal "amateur" — and amateurs don't get credit cards out. Clean, professional photos signal "real business," and real businesses make sales.
For years, getting those photos meant a camera you couldn't use, a studio you couldn't afford, or a photographer who charged more than your first month of revenue. In 2026, AI changes the math completely. You can turn the snapshot you took on your kitchen table into a studio-grade product shot in seconds. Here's exactly how — the full workflow, the prompts that actually work, the mistakes that quietly cost you sales, and the questions every beginner ends up asking.
Why photos matter more than you think
Online, customers can't touch, hold, or try your product. Photos are the entire sensory experience. They communicate quality, scale, materials, and care. Stores with professional imagery convert dramatically better than stores with phone snaps — not because the product is different, but because the trust is. If you only fix one thing on your store this week, fix the photos.
It helps to understand why this happens. A first-time visitor lands on your page with one unspoken question: "Is this a real store, or is someone about to take my money and disappear?" They can't run a background check in three seconds, so their brain does the next best thing — it looks for visual proof. Sharp, consistent, well-lit photos read as competence. Inconsistent lighting, mismatched backgrounds, and pixelated crops read as risk. The product could be identical; the perceived legitimacy is not.
There's also a compounding effect. Every channel you sell on judges your images too. Marketplace algorithms favor listings with clean, high-resolution photos. Social ad platforms reward creative that holds attention. Search engines increasingly surface image results. Better photos don't just lift your on-site conversion rate — they make every dollar you spend driving traffic go further. The image is the asset that does the most work for the least ongoing effort.
Consider the journey a single photo takes after you make it. It becomes your listing thumbnail, where it competes against a grid of rivals for one click. It becomes the first frame of your social ad, where it has to survive a thumb moving at full speed. It gets pulled into your email campaigns, your "you might also like" carousels, and the preview card that shows up when someone shares your link in a chat. One strong image is quietly working in a dozen places you never see. One weak image is quietly losing in all of them. That's why photography is rarely a "nice to have" line item — it's upstream of almost every conversion you'll ever measure.
The fastest, cheapest "redesign" you can give a struggling store isn't a new theme or a new logo. It's replacing every product photo with a clean, consistent, professional one.
The two-step method: shoot rough, finish with AI
You don't need expensive gear. You need a decent raw shot and the right AI finishing. Here's the workflow:
Step 1 — take a clean raw photo. Use natural light (a window on an overcast day is perfect), put your product on a plain surface, and fill the frame. Don't worry about a perfect background or studio lighting — that's the AI's job. You're capturing the product accurately; the AI handles the polish.
Step 2 — finish with AI. Upload your shot and tell the tool the look you want. The AI can clean up the background, fix the lighting, place the product in a lifestyle scene, or generate a full ad creative around it. What used to be hours in Photoshop is now seconds.
The reason this two-step approach beats trying to "shoot it perfectly" the first time is leverage. A flawless studio shot requires controlled lighting, the right lens, a clean sweep backdrop, and post-processing skill — four things most founders don't have. A clean raw shot only requires that the product be in focus, evenly lit, and unobstructed. That's achievable on any phone in five minutes. You're deliberately splitting the job: you handle accuracy, the AI handles polish. Neither half is hard on its own.
How to get the raw shot right (so the AI has something to work with)
AI finishing is powerful, but it isn't magic — garbage in still limits the output. Spend two extra minutes on the capture and everything downstream gets easier:
- Light from the side, not from above. Place your product next to a window so light rakes across it. This reveals texture and shape. Overhead light flattens everything.
- Avoid harsh direct sun. Bright, direct sunlight creates hard shadows and blown-out highlights the AI has to fight. Overcast days, or a sheer curtain over the window, give you soft, even light for free.
- Shoot in focus and fill the frame. Tap to focus on the product, hold the phone steady, and get close enough that the product occupies most of the image. More real pixels on the product means a cleaner enhancement.
- Keep the background boring. A plain wall, a sheet, or a clean tabletop. You're going to replace it anyway, so the only job of the background here is to not confuse the AI about where the product ends.
- Capture every angle you'll need. Front, three-quarter, top-down, and a tight detail crop. It's far easier to enhance four honest angles than to ask AI to invent a side it never saw.
A few smaller habits separate a usable capture from a frustrating one. Wipe the lens before you start — a thumbprint smear is the single most common reason a "blurry" photo isn't actually out of focus. Turn off your phone's flash; the built-in flash fires straight at the product and flattens it with a hard, central hotspot that no amount of AI can fully undo. Brace your elbows on the table or lean against a wall instead of shooting free-handed, because micro-shake at close range is what turns crisp edges into mush. And shoot a couple of frames of each angle rather than one — storage is free, and having a backup means you're never stuck enhancing your only slightly-soft attempt.
One more thing worth getting right: contrast between the product and its background. A white mug on a white sheet, or a black gadget on a dark desk, gives the AI almost nothing to grip when it tries to separate subject from background. You'll see halos, chewed-up edges, or bits of the product erased entirely. Put a light product on a mid-tone surface and a dark product on a lighter one. You're not styling the shot — you're just making the product's outline unmistakable, which is the one thing the enhancement step genuinely depends on.
The three shots every product needs
- The clean shot — your product on a pure white or simple studio background. This is your main listing image and your most important one.
- The lifestyle shot — your product in context (on a marble counter, in a cozy room, outdoors). This helps buyers picture it in their life.
- The detail shot — a close crop that shows texture and quality, the thing they'd inspect if they could hold it.
With AI, you can generate all three from a single decent photo, which means a consistent, professional gallery for every product — even if you have a hundred of them.
Each shot does a specific job in the buyer's decision, and skipping any one leaves a gap. The clean shot answers "what exactly am I buying?" — it has to be unambiguous, which is why marketplaces and your own listing thumbnail almost always want a white or neutral background. The lifestyle shot answers "would this fit my life?" — it sells the feeling and the scale, and it's the image that performs best in social ads because it stops the scroll. The detail shot answers "is this actually well-made?" — it closes the trust gap for the careful buyer who would have picked the item up in a store. Together they walk a stranger from curiosity to confidence without a single word.
There's a deliberate order to how a good gallery is read, too. The hero earns the click. The second image — usually a lifestyle scene — earns the lean-in, the moment a curious visitor decides to keep scrolling instead of bouncing. The detail and scale shots that follow are there for the buyer who has already half-decided and is now looking for a reason to not buy; your job is to remove that reason before they find it. Sequence your gallery the way a salesperson would talk: grab attention, build desire, then answer objections. A pile of equally-weighted images in random order makes the visitor do that work themselves, and most won't bother.
How many images per product?
A practical target is four to six images per listing: one clean hero, two lifestyle scenes that show different contexts, one or two detail crops, and — where it makes sense — a shot that communicates scale (the product in a hand, next to a familiar object, or on a recognizable surface). Beyond six, returns diminish quickly, and you're better off making those six excellent than adding a seventh mediocre one.
The prompts that actually work
The quality of your AI photo depends on the clarity of your instruction. Vague prompts get vague results. Specific, sensory prompts get magazine-quality output. A few that reliably work:
- "Place the product on a clean seamless studio backdrop with soft gradient lighting, premium catalog photography."
- "Product on a sunlit marble kitchen counter, soft natural light, lifestyle product photography."
- "Outdoors on natural stone with greenery, golden-hour lighting, lifestyle shot."
- "Top-down flatlay on a wooden desk with minimal props, bright even lighting."
Notice the pattern: they name the surface, the lighting, and the mood. That's the formula. For a deeper library of prompts and before/after examples, see the product photo prompt guide and how AI replaces $10k photoshoots.
The four-part prompt formula, in detail
Once you internalize the structure, you can write a strong prompt for any product in seconds. Think of it as four slots:
- Surface / setting — where the product physically sits. "Seamless white backdrop," "marble counter," "weathered oak table," "natural stone with moss."
- Lighting — the single biggest driver of perceived quality. "Soft gradient studio lighting," "golden-hour side light," "bright even daylight," "moody low-key lighting with a single soft source."
- Mood / style — the genre you're imitating. "Premium catalog photography," "warm lifestyle editorial," "minimal Scandinavian flatlay," "high-contrast advertising."
- Camera cues (optional but powerful) — "shallow depth of field," "shot on 50mm," "slight top-down angle," "macro close-up." These nudge the model toward realistic photographic output instead of an illustrated look.
A finished prompt might read: "My ceramic mug on a weathered oak table beside a linen napkin, soft golden-hour side light, warm lifestyle editorial photography, shallow depth of field." Every slot is filled, nothing is left to chance, and the result will be far more usable than "make my mug look nice."
What to do when a prompt doesn't land
Even a well-built prompt sometimes misses, and the instinct to rewrite it from scratch is usually wrong. Change one slot at a time so you can actually learn what moved the result. If the scene looks artificial, swap only the lighting cue — "soft natural window light" fixes more "fake-looking" outputs than any other single change. If the props are fighting the product, dial the mood toward "minimal" and remove descriptive clutter. If the product itself is drifting in shape or color, your prompt is too ambitious for the source: simplify the scene, lower the resolution gap you're asking the model to bridge, and let the enhancement lean on your real photo rather than inventing.
It also helps to know what not to put in a prompt. Don't stack five adjectives where one will do — "ultra hyper premium luxury cinematic" reads as noise and often produces a muddier image than "premium catalog photography." Don't describe the product's features in the scene prompt (the model already has the photo for that; describing them again invites it to redraw and warp them). And resist contradictory instructions like "bright and moody" or "minimal flatlay with lots of props" — pick a lane. A focused three-slot prompt beats a maximalist one almost every time.
Matching prompts to product categories
Different products flatter different treatments. A few starting points:
- Apparel and soft goods — favor lifestyle scenes and natural light; flat, sterile studio shots make fabric look lifeless.
- Jewelry and small metal goods — favor controlled studio lighting, dark or gradient backdrops, and macro detail crops that catch reflections.
- Skincare, supplements, and packaged goods — favor clean surfaces (marble, glass, stone), bright even light, and props that signal the ingredient story (botanicals, water droplets).
- Home and decor — favor in-context room scenes that establish scale and style.
- Food and beverage — favor warm light, shallow depth of field, and fresh garnish props; avoid flat top-down light that kills appetite appeal.
- Electronics and gadgets — favor clean, slightly cool studio lighting and uncluttered surfaces; reflective screens and glossy housings look premium against a soft gradient and cheap against a busy scene.
- Candles, ceramics, and handmade goods — favor warm side light and natural textures (linen, raw wood, stone) that reinforce the "made by a human" story buyers are paying extra for.
Common mistakes that quietly cost you sales
Most photo problems aren't dramatic — they're small, consistent leaks. Watch for these:
- Inconsistent backgrounds across a gallery. One white, one beige, one cluttered desk. Inconsistency reads as carelessness. Pick a system and apply it to every product.
- Over-enhancing until it looks fake. Cranked saturation, plastic-smooth surfaces, and impossible lighting trip a buyer's "this isn't real" alarm and increase returns. Aim for "best version of the truth," not "obviously edited."
- Wrong aspect ratios. A square hero, a portrait ad, and a banner all crop differently. Generate or export the ratios each channel needs instead of stretching one image everywhere.
- Letting the AI warp the product. When a model "imagines" a logo, a label, or a hardware detail, it sometimes garbles it. Always zoom in and verify text, branding, and key features survived the enhancement.
- Low input resolution. A tiny, blurry source photo limits how good the output can be. Start with the highest-quality raw shot you can capture.
- No scale reference. Buyers consistently misjudge size online, leading to disappointed returns. Include at least one shot that makes the dimensions obvious.
- Floating products with no shadow. When the background is replaced but no grounding shadow is added, the product looks pasted-on and cheap. A soft contact shadow under the item is what makes it read as physically present in the scene.
- Color shift on the product itself. Aggressive relighting can quietly change a navy bag to black or a cream sweater to white. Compare the enhanced color to the real item, not just to "does it look nice," because color is one of the top reasons people return.
A simple workflow safeguard catches most of these before they reach a customer: open the original and the enhanced image side by side at full size before you publish. Ninety percent of the failures above — warped logos, drifted colors, missing shadows, fake-looking smoothing — are obvious the instant you see the two frames together, and almost invisible when you only glance at a thumbnail. Build that one comparison step into your routine and your reject rate on bad images will fall to near zero.
A note on honesty
AI should enhance your product, not misrepresent it. Fix the lighting and background, place it in a beautiful scene — but don't invent features or change what the product actually is. Misleading photos drive returns and kill trust. The goal is to show your real product at its best, the way a professional photographer would.
There's a practical line worth holding: it's fine to improve presentation (lighting, background, composition, scene), and it's not fine to alter substance (color the product doesn't come in, a finish it doesn't have, a size it isn't). A useful gut check before you publish a generated image: "If this product arrived on the customer's doorstep, would they feel the photo was accurate?" If yes, ship it. If you'd have to brace for a one-star "not as pictured" review, regenerate. Honest enhancement compounds into reviews and repeat customers; flattering-but-false photos compound into returns and chargebacks.
This isn't only an ethics question — it's increasingly a compliance one. Ad platforms reject creative for misleading visuals, marketplaces remove listings whose photos don't match the item, and a pattern of "not as described" disputes can put your payment processing at risk. Accurate enhancement keeps you on the right side of all three. The good news is that the honest path and the profitable path point the same direction here: the photo that earns a sale and the photo that earns a happy, non-returning customer are the same photo.
Where to do it
You can stitch together a few separate apps for background removal, upscaling, and scene generation — or use a tool that does all of it and writes the matching ad copy too. Zentrix's Image Studio is built into the store, so your enhanced photos flow straight onto your product pages and into your ads. Explore it on the features page, and once your photos look the part, make sure people can find them with AI SEO for your store and the rest of the 2026 AI toolkit.
The advantage of doing this inside the platform you already sell on is that the photo is never the finish line — it's the start of a pipeline. An enhanced image is only valuable once it's on the product page, sized correctly for each placement, and wrapped in copy and ads that match its quality. When Zentrix turns your plain-English business idea into a complete, live store — brand, storefront, legal docs, supplier links, and marketing — your imagery is generated in the same flow as everything else, so nothing falls out of sync. You don't export a file and re-upload it three places; the polished photo is already where it needs to be. And because Zentrix is free to start, you can stand up a real store and see your enhanced catalog live before you spend a cent.
The stitched-together approach has a hidden tax that's easy to miss until you feel it. Every tool you bolt on is another login, another export, another set of file dimensions to reconcile, and another place for your branding to drift out of step. By the time you've background-removed in one app, upscaled in another, generated a scene in a third, and written ad copy in a fourth, you've spent more time moving files than improving them — and your catalog still doesn't feel like one coherent brand. Keeping image, copy, sizing, and publishing under one roof isn't just convenient; it's what makes a hundred-product store look like it was built by a team instead of assembled by hand at midnight.
Frequently asked questions
Do I need a real camera, or is a phone enough?
A modern phone is more than enough for the raw shot. The whole point of the two-step method is that you only need a clean, in-focus, evenly lit capture — the AI handles the studio look. A dedicated camera can give you a little more resolution and control, but it is not a requirement, and for most founders the phone in their pocket is the right tool.
Will AI-enhanced photos look fake or "off"?
They will if you over-enhance. The failure mode is pushing saturation, smoothing, and lighting past the point of believability. The fix is restraint: aim for a clean, natural, professionally-lit version of your real product. Start from a high-quality raw shot, keep edits subtle, and always zoom in to confirm labels, logos, and textures still look genuine before you publish.
How long does it take to do a full product gallery?
For a single product, capturing your angles takes a few minutes and generating the clean, lifestyle, and detail shots takes seconds each. The slow part used to be a studio booking and a Photoshop session; with AI finishing, a polished multi-image gallery is realistically a few minutes of work per product.
Is it legal and ethical to edit my product photos with AI?
Yes — editing your own product photos is standard practice; professional photographers have retouched lighting and backgrounds for decades. The ethical line is misrepresentation: don't show features, colors, or sizes the product doesn't actually have. Improve presentation, not substance, and you're on solid ground.
What resolution and aspect ratios should I export?
Export high enough that the image stays sharp on large screens, and produce the specific ratios each placement wants: a square or near-square hero for listings, portrait crops for mobile and social ads, and wider crops for banners. Generating the right ratio beats stretching one image to fit everywhere, which distorts the product.
Can I use AI photos in my paid ads?
Yes, and lifestyle-style AI shots tend to perform especially well in ads because they show the product in context and stop the scroll. Just keep them honest — ad platforms and customers both penalize misleading creative. Enhanced-but-accurate images are the sweet spot. Pairing them with matching ad copy, which Zentrix can generate alongside the image, keeps the whole creative consistent.
How do I keep a consistent look across dozens of products?
Decide on a system up front — the same background treatment for hero shots, a consistent lighting mood, and a repeatable set of lifestyle settings — and apply it to every product. Reusing the same prompt structure (surface, lighting, mood) across your catalog is the easiest way to make a hundred different products feel like they belong to one brand.
What if my product photo turns out blurry or low quality?
Re-shoot the raw capture if you can — a sharper source always produces a better result than trying to rescue a bad one. If a re-shoot isn't possible, AI upscaling can recover some detail, but it can't invent information that was never in the frame. The reliable path is to start clean: focus, fill the frame, and light from the side.
My product is reflective or transparent — does AI handle glass, mirrors, and chrome?
These are the hardest cases, because reflections and refractions carry real information the model can accidentally rewrite. The trick is to make the original capture do more of the work: shoot reflective and glass products against a simple, evenly-lit background so the reflections that show up are clean and intentional, then keep the enhancement gentle. Aggressive scene generation around a mirror or a glass bottle is where you'll see the most warping, so favor background cleanup and lighting fixes over dropping these items into busy new scenes.
Should every photo in my store look identical, or is some variety good?
Consistency and variety aren't opposites — you want consistency in treatment and variety in content. Every hero shot should share the same background and lighting mood so the catalog feels unified, but your lifestyle scenes should vary enough to show the product in genuinely different contexts. The goal is a gallery that looks like one brand shot it on purpose, not a single repeated template and not a chaotic mix of unrelated styles.
Can AI generate a photo of a product I haven't received yet?
It can, but tread carefully. Generating an image from a supplier's stock photo or a 3D mock-up is fine for planning and layout, but publishing a fully invented product image crosses the honesty line if it doesn't match what the buyer will actually receive. Whenever possible, wait for the real item and enhance a real photo. If you must launch before stock arrives, label placeholder imagery honestly and replace it with genuine shots as soon as you can.
Do AI-enhanced photos hurt or help my store's SEO?
They help, as long as the basics are in place. Search engines can't see "beauty," but they reward fast-loading, properly-sized, well-described images, and clean professional photos earn more clicks and longer visits — signals that do matter. Export at a sensible file size, give every image descriptive alt text, and you get the conversion benefit and the discoverability benefit together. Our guide to AI SEO for your store walks through the technical side.
Professional photos used to be a barrier. Now they're a button. There's no reason for your store to look amateur in 2026 — and every reason for it to look like the real business it is.